
Hello! I finally did it, my first diy of the year! I've been working on my craft room off and on, it's not done yet, but I needed to do something crafty. So I cleared off my work table and got to work. I bought some glass jars at Hobby Lobby for my dogs' treats and just for fun I wanted to label them. Instead of chalkboard paint (which I love) I went with the vinyl chalkboard surface, also at Hobby Lobby and made the labels myself, so here is the DIY instructions for it!

This is a super easy project and fun and addicting. As you will see I made a ton of labels, just for fun! Also don't forget to read some tips below the diy!

The Supplies you will need is:
1.) Chalkboard Vinyl Surface - It will stick to almost anything, plus it's removeable and reusable!
2.) Cricut cartridges- I used Storybook and Songbird
3.) Jar - Or anything with a smooth surface
4.) Cricut Machine - This one is the Cricut Create, any cricut will do
5.) Cricut Mat
6.) Scissors
1.) Chalkboard Vinyl Surface - It will stick to almost anything, plus it's removeable and reusable!
2.) Cricut cartridges- I used Storybook and Songbird
3.) Jar - Or anything with a smooth surface
4.) Cricut Machine - This one is the Cricut Create, any cricut will do
5.) Cricut Mat
6.) Scissors

Step 1: Cut the chalkboard vinyl to the size of the cricut mat. Smooth out any air bubbles.


Step 3: Program your cricut with the shape, size, and any other feature.

Step 4: Press the cut key and the cricut will cut your shapes. Since vinyl is a little thicker than paper, make sure your mat is sticky to where the vinyl will stay on, if not hold it down as it cuts, just be careful not to get too close to the blade. And if the vinyl slips off the mat while cutting, just press the stop button and unload, then realign and start over with cutting.

Step 5: Peel off your shapes. They should peel off easily. If not, like the big one on the left of the mat, lift off what you can then use your scissors and carefully trim off the rest of the vinyl. The blade may have left an imprint so cutting may not be super hard.
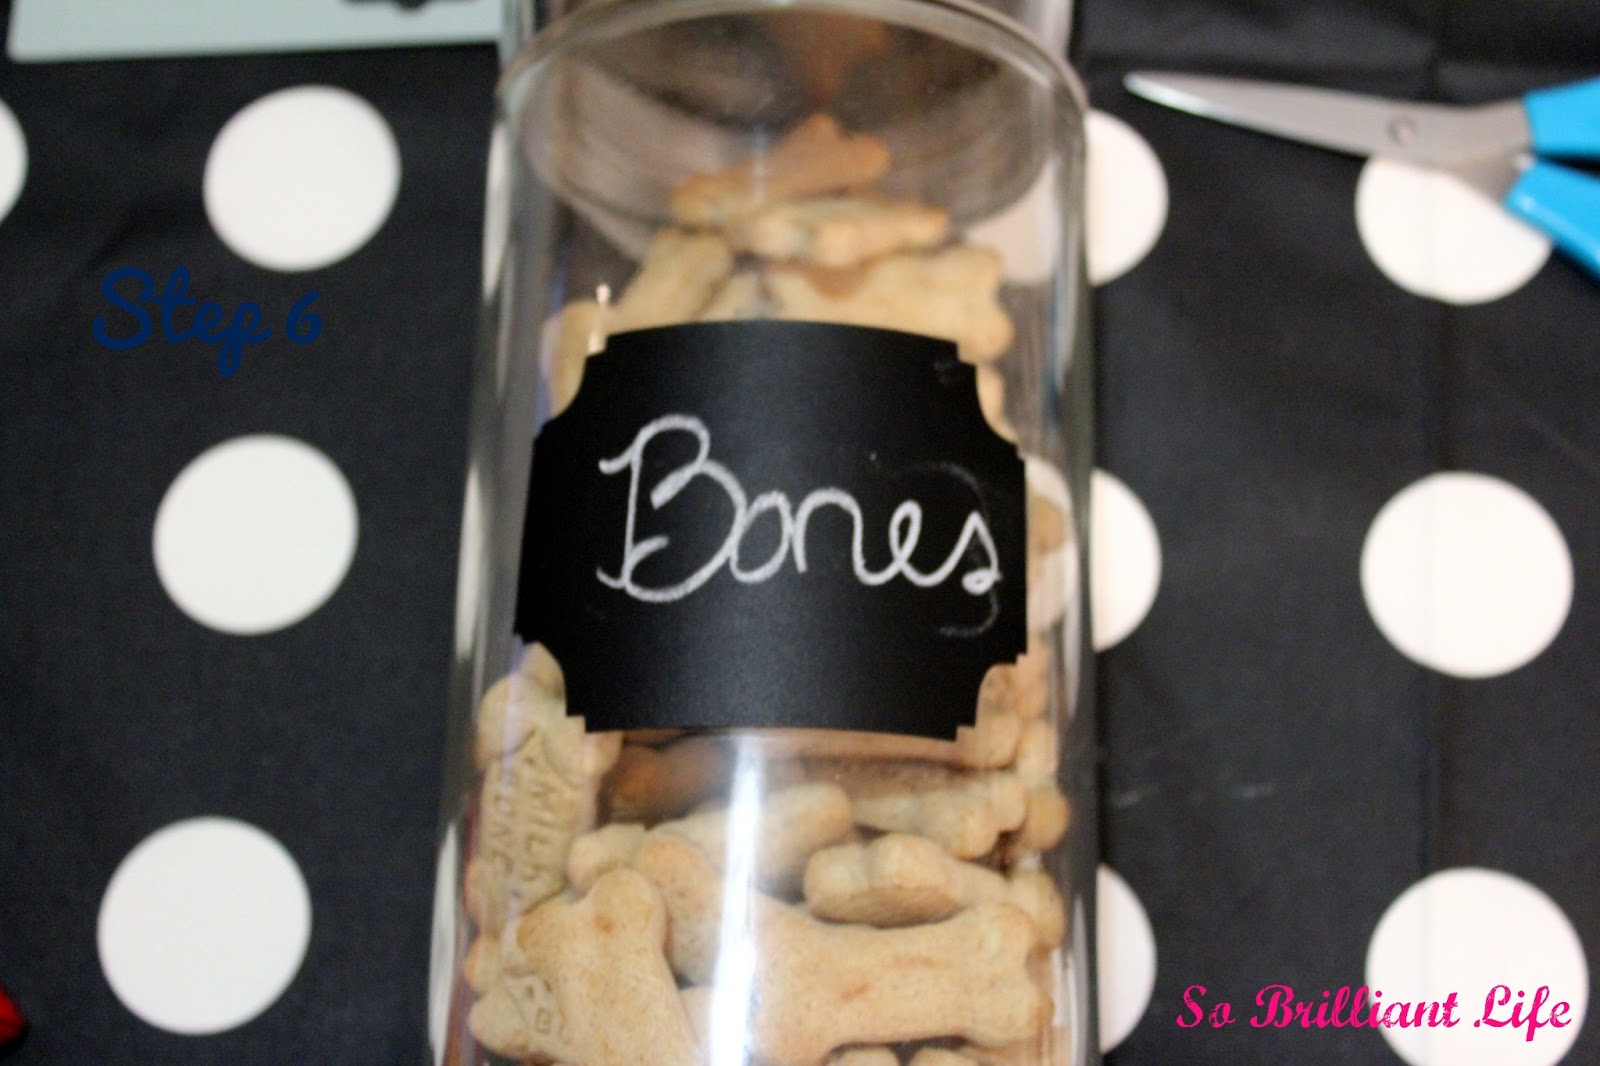
Step 6: Peel off the vinyl backing and stick to the jar (or whatever you decide to label).

Step 7: Write on you labels using chalk and have fun!
As you can see I love these chalkboard labels. And yep, I had to put a bird on it (Portlandia reference), which turned out a little small. I like it none the less. So yeah, next up will be my sugar, flour, and etc canisters... and probably more!
I did make a few mistakes on this diy, so here's my tips from what I learned.
- Before cutting the vinyl, practice on a regular sheet of paper. I didn't quite get the right size at first, as you see in the picture of the cut vinyl. This way you don't waste your vinyl trying to figure out what size labels you want.
- Make sure your cricut mat is really sticky. Mine wasn't, so the vinyl came up from the mat when cutting. If it's sticky, you shouldn't have to hold it down. Plus the shapes should cut out fully.
Cost of project-
-Jars - $5.00 and under per jar, plus half off (Hobby Lobby)
-Chalkboard Vinyl Surface- $7.99 orig. $4.79 with 40% coupon (Hobby Lobby)
So, all together, with my 4 jars and chalkboard vinyl, for my project, it was under $10. Not to bad. That is if you already have the rest of the supplies. The cricut machine cost anywhere from $120 to $300 depending on the size and kind you get. The machines already include the mat, blade, and even a cartridge. Now I think most machines come with a pre loaded cartridge with shapes and fonts. Cricut has evolved since I first got mine. You can check out the Cricut website for more information of that.
As an alternative, if you don't have a cricut machine and don't want to buy one, you can just use a stencil of the shape you want to cut, a pencil to trace, and scissors or an exacto knife to cut it out!
Well, I hope you enjoyed this diy. It's super simple, fun, and addicting. I love it! The dogs, however love what's inside better! :)

Now to go make some labels for more things. Thanks for reading! :) -Jen
No comments:
Post a Comment