Pages

Showing posts with label Decor. Show all posts

Wednesday, March 12, 2014

Dining Room Inspiration

Hey guys! The blog renovation is still going on. It should all be finished soon though. But I was thinking, why wait till everything is done to post. I know it has been a little while since I last posted something. So today I wanted to share some Home Inspiration. I've created a few sets on Polyvore (love that site!). If you don't know what Polyvore is it's a website where you can create collages of anything like fashion to home ideas. I'm working on a collection of home inspiration boards for each room in my house and today I want to share my Dining room Inspiration!
Dining Room Inspiration

Dining Room Inspiration by sobrilliantlife


My dining room is connected to my living room, which I will have my living room one up here soon as well! In this room I want a buffet, which I will have from my mom, who got it from my grandma. I can't wait to get it to my house. The rug I love, I found one at Ikea for $200, not too bad, but it's something I have to save up for. I have some fabric framed that's dessert themed already, I find it fun. I just love the look of this all together. In reality some pieces won't be the same, but close. I'm on a budget, and if you've used polyvore, your know that the items they have to choose from range from inexpensive (Target prices) up to thousands of dollars. I'm not going to buy a $1,000 rug when I can get a similar one for $200. It's just not in my budget now. I do believe that sometimes the more is cost the better quality it is and sometimes you have to splurge, But as long as you stick in your budget, you can have an awesomely decorated room!
Well that's all for this post, to see the items I used, click on the link below the picture. And if you created you're own, let me know in the comments, I want to see!!! And follow you on polyvore too!
Thanks for reading!
Shine Bright -Jen

Thursday, April 11, 2013

Chalkboard Labels DIY

Hello! I finally did it, my first diy of the year! I've been working on my craft room off and on, it's not done yet, but I needed to do something crafty. So I cleared off my work table and got to work. I bought some glass jars at Hobby Lobby for my dogs' treats and just for fun I wanted to label them. Instead of chalkboard paint (which I love) I went with the vinyl chalkboard surface, also at Hobby Lobby and made the labels myself, so here is the DIY instructions for it!


This is a super easy project and fun and addicting. As you will see I made a ton of labels, just for fun! Also don't forget to read some tips below the diy!
The Supplies you will need is:
     1.) Chalkboard Vinyl Surface - It will stick to almost anything, plus it's removeable and reusable!
     2.) Cricut cartridges- I used Storybook and Songbird
     3.) Jar - Or anything with a smooth surface
     4.) Cricut Machine - This one is the Cricut Create, any cricut will do
     5.) Cricut Mat
     6.) Scissors

Step 1: Cut the chalkboard vinyl to the size of the cricut mat. Smooth out any air bubbles.


Step 2: Pick the shapes you want to cut. I chose from Songbird (the one on the right), the top label. Any shape will work as long as it have enough room to write on.

Step 3: Program your cricut with the shape, size, and any other feature.


Step 4: Press the cut key and the cricut will cut your shapes. Since vinyl is a little thicker than paper, make sure your mat is sticky to where the vinyl will stay on, if not hold it down as it cuts, just be careful not to get too close to the blade. And if the vinyl slips off the mat while cutting, just press the stop button and unload, then realign and start over with cutting.


Step 5: Peel off your shapes. They should peel off easily. If not, like the big one on the left of the mat, lift off what you can then use your scissors and carefully trim off the rest of the vinyl. The blade may have left an imprint so cutting may not be super hard.
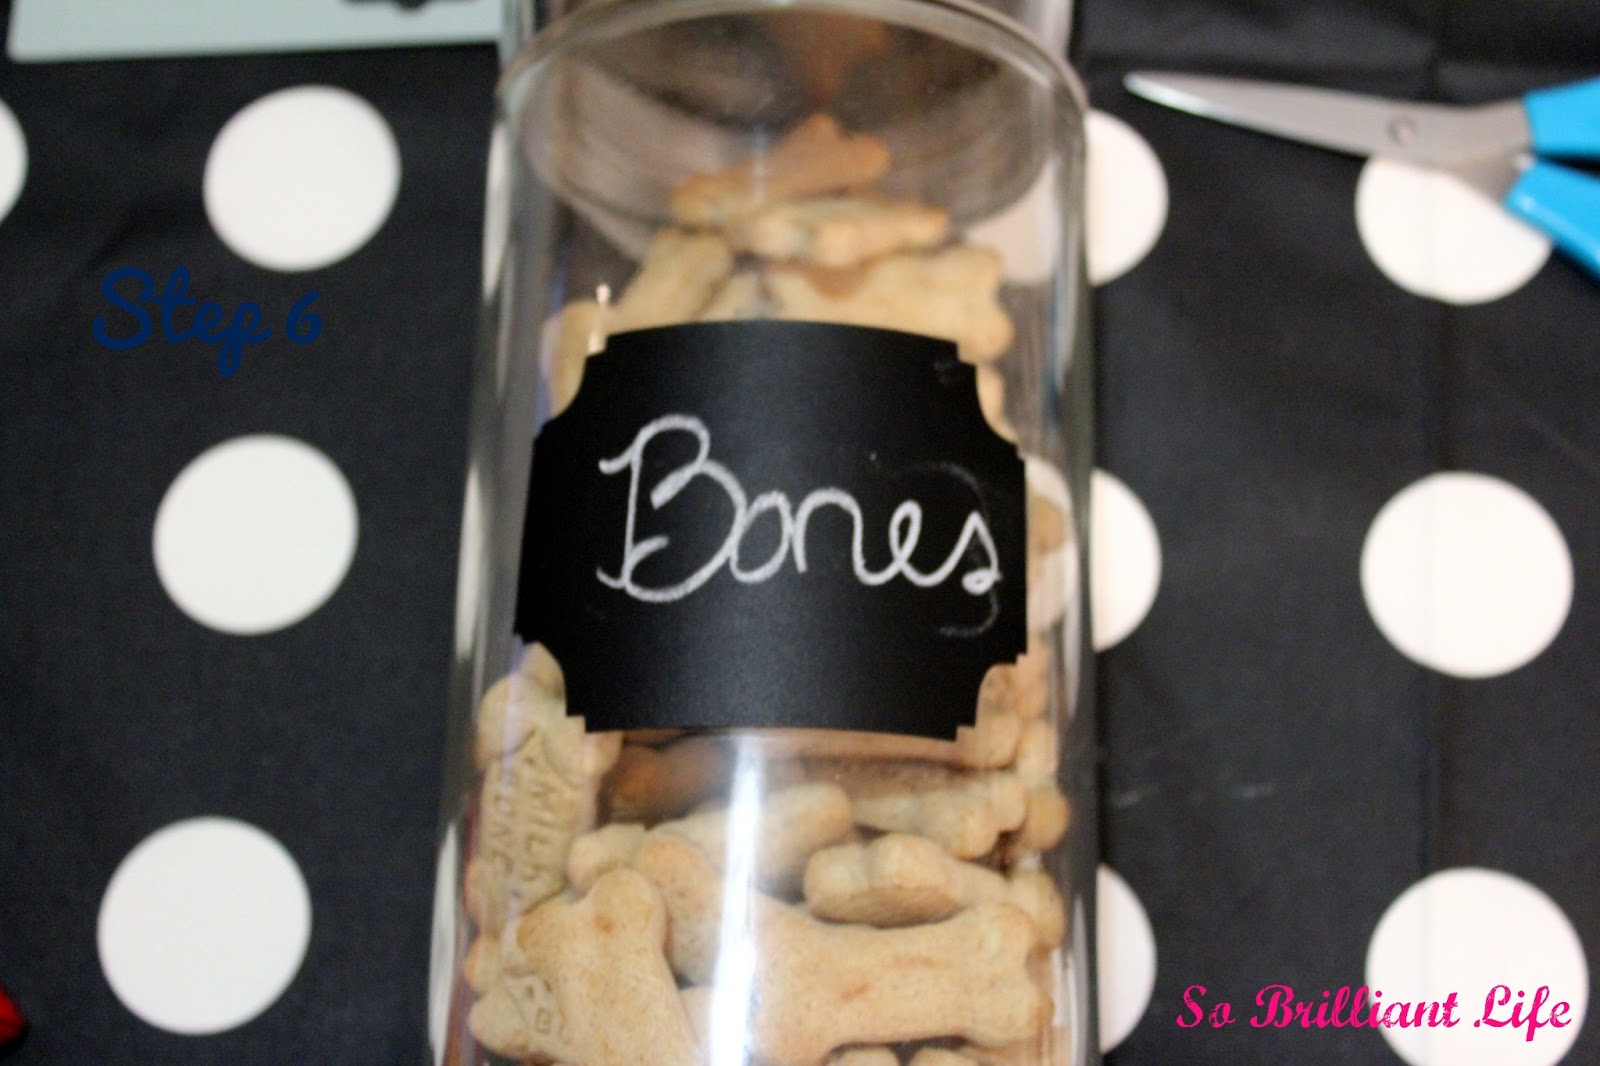
Step 6: Peel off the vinyl backing and stick to the jar (or whatever you decide to label).


Step 7: Write on you labels using chalk and have fun!

As you can see I love these chalkboard labels. And yep, I had to put a bird on it (Portlandia reference), which turned out a little small. I like it none the less. So yeah, next up will be my sugar, flour, and etc canisters... and probably more!

I did make a few mistakes on this diy, so here's my tips from what I learned. 
- Before cutting the vinyl, practice on a regular sheet of paper. I didn't quite get the right size at first, as you see in the picture of the cut vinyl. This way you don't waste your vinyl trying to figure out what size labels you want.
- Make sure your cricut mat is really sticky. Mine wasn't, so the vinyl came up from the mat when cutting. If it's sticky, you shouldn't have to hold it down. Plus the shapes should cut out fully.

Cost of project-
  -Jars - $5.00 and under per jar, plus half off (Hobby Lobby)
  -Chalkboard Vinyl Surface- $7.99 orig. $4.79 with 40% coupon (Hobby Lobby)
     So, all together, with my 4 jars and chalkboard vinyl, for my project, it was under $10. Not to bad. That is if you already have the rest of the supplies. The cricut machine cost anywhere from $120 to $300 depending on the size and kind you get. The machines already include the mat, blade, and even a cartridge. Now I think most machines come with a pre loaded cartridge with shapes and fonts. Cricut has evolved since I first got mine. You can check out the Cricut website for more information of that.

As an alternative, if you don't have a cricut machine and don't want to buy one, you can just use a stencil of the shape you want to cut, a pencil to trace, and scissors or an exacto knife to cut it out!
Well, I hope you enjoyed this diy. It's super simple, fun, and addicting. I love it! The dogs, however love what's inside better! :)


And yes, Riley and Lily both love bacon! I do too, I mean real bacon, not bacon dog treats!
Now to go make some labels for more things. Thanks for reading! :)  -Jen

Monday, November 28, 2011

I love Crafting!

I've had kind of a uncrafty few weeks. I miss crafting. I bought some mini canvas recently and I love them. They are perfect and cute and great for little simple paintings! Right now i'm working on some simple craft theme paintings. The camera one is kinda inspiring me to paint a bigger canvas full of all cameras.
This is a just for fun project, but i'm thinking they would also make cute little gifts!
I love the Christmas season! I totally want to make a lot of handmade things for this holiday, i'm excited!
I think I will look at pinterest for ideas. Have a lovely week!
-Jen

Sunday, July 10, 2011

2nd Vintage Purchase!

Back and here's what I bought. I went to a local antiques store and they were having a flea market outside. It was very cool, but I didn't really see anything and it was hot out so I went inside and checked out what i've been thinking about getting and checked in there previously 3 times to see if they still had it and they did. I took a lot of time thinking about the price and if I really wanted it. Well today it was 20% off, so I decided to get it. I love saving money. And I love vintage glass. Depression and milk glass are my favorites. I'm not entire sure what this is or what year it is, but I like and i've never seen anything like it, especially now a days. I can't wait to use it!

I think it's super pretty. I would like to know more about it. I think i'm going to do a little research on vintage glass. And think of what to use it for.
Night! -Jen

Just Lovely...

Hey! Hope you all are enjoying this lovely and hot (atleast here, 92, thank God for a/c at the home) Sunday. I'll be sharing more later tonight, but I wanted to share that I bought my second vintage purchase!!! My first was a 1970s (?.. or around there) suitcase. My second I bought today is a piece that i've been watching for quite awhile and thinking about... it was love at first sight. It's a glass bowl. I'll post a pic and more tonight, but now I have to get ready for a BBQ at the park!
Have a lovely Sunday evening!
-Jen