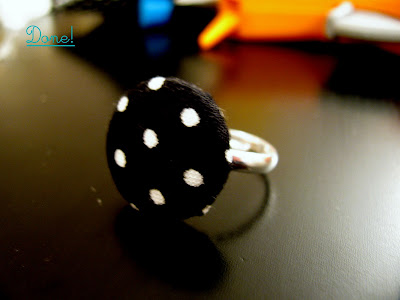
I love making my own jewelry. It's fun to create and wear a one of a kind piece. I've always wanted to make button rings so here's a super easy diy for it!
All the supplies can be found at most craft stores. I bought everything from Hobby Lobby (except this pair of scissors). And if you can do this diy for super cheap if you watch for sales. I'll explain the cost at the end of this post!
This super easy diy is done with only 4 simple steps.
1.) Cut out a circle alittle bigger than the button cap. You can either free hand or draw a circle on the wrong side of the fabric. I cut it free hand. If your buying fabric, less than 1/8th of a yard will be more than enough. Also make sure when cutting the fabric you cut where the print you want centered on the button to be in the center of your cut. They do have different sizes of this button covers and backings too, so if you have a bigger print you can make a bigger button. I chose the 3/4 in for this one.
2.) Remove the button loop on the backing with pliers. It just takes a few pulls and a little bending of the ends of the loop.
3.) Put the fabric circle the wrong side up into the white mold, then put the button cover in it. Push the excess fabric into the button cover, then put the backing on it. Push it down until it snaps into place. Mine only snapped in on one side, so I took it out of the mold and used pliers to push the other side in. Be careful not to put too much pressure where it may bend the button cap.
4.) Use either hot glue, a metal glue, or a jewelry glue for metals**. I used hot glue, because I couldn't find my metal jewelry glue (which I would use that because it bonds really well, also bonds well to your hands so be careful). The hot glue worked well after the 2nd time. I glued the ring then pushed it into the back of the button. Let it sit for a bit. It stayed together for a while then came off when I put on a sweater. So I re glued it, putting glue on both the button and the ring and adhered. It is staying together better after that. Also hot glue dries quickly. And don't worry about the strings, they pull off easily after it dries.
 |
| *This is the Jewelry and Metal Glue. It should bond instantly and be careful not to get it on your hands. Source |
There you have it! It took about 30 mins to make. And here is the cost break down of the project-
1.) Fabric - depending on the cost per yard. Hobby Lobby always has their Cotton Calicos and Apparel 30% off. It will definitely under $1.
2.) Glue Gun - if not on hand they are alittle under $3.00, use the 40% hobby lobby coupon to save more!
3.) Button Cover and Cap kit- $2.99. But with a 50% sewing notion sale it was only $1.49. And it can make 5 buttons (or button rings)!
4.) Ring - $1.47 ($0.73 with 50% off). Found in the jewelry make department. Look for sales too and they have multi-packs too!
5.) Scissors- if not on hand they are $1.99 ($1.19 with coupon).
So total cost with sales, and not including the scissors and glue gun:
5.) Scissors- if not on hand they are $1.99 ($1.19 with coupon).
So total cost with sales, and not including the scissors and glue gun:
~$1.50 (appox.)
That's super cheap for a ring! I can't wait to make more with different fabrics!!!
That's super cheap for a ring! I can't wait to make more with different fabrics!!!
Happy Crafting!
-Jen


So cute! I've never seen one of these rings. I like the fabric you chose...you know me with my black& white :)
ReplyDelete